This is the first post on making a balconet bra using pre-formed cups. I made a first bra in this way in a workshop at Kantje Boord (the famous lingerie notions shop in Amsterdam, Paula who gave the workshop did not mind my posting this). In this post I will describe the way the cup is covered with a stretch lace.
Just to give you an idea: this is my first bra with preformed cups:

For the bra in this and in following posts I used embroidered lace with a little bit of stretch. The basic color of the lace is the same as the cup, which makes there is no need for a separate layer under the lace for matching colors. That’s for another bra/post.
| Step 1 – The cup is cut from a preformed cup that was not intended for a balconet bra. Use a cup that you can find in your size. I’m not able to advise on this, as I’m only sewing for myself and occasionally my daughter. |
 |
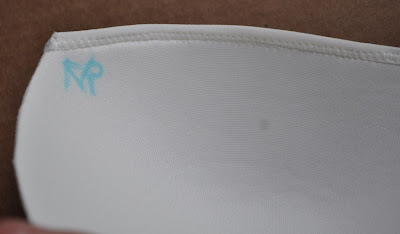
| Once cut the center front is not very obvious any more. Mark left/right and center front on the inside. I used a marker that will disappear with water |
  |
| Step 2 – The upper edge is covered with foldover elastic (foe). The photo is a bit blurry unforturenately . Start by pinning the beginning of the foe on the edge (only 1 pin) and have a little extra to start with. Sew the elastic with a zigzag stitch. I don’t like working with foe, but if you work slowly it’s not too bad. Work like this: stitch – stop – stitch –stop….. Everytime you stop you pull the elastic a little bit and fold it over the edge for a few centimeters. |
   |
| Step 3 – The cup is covered with lace. This is my pattern from the workshop. The upper edge is the the scallop side. |
 |
 |
| If possible (depending on the embroidery) try to have as less embroidery on the seam and especially not at the center point that I marked in the photo below. It makes a beautiful curve more difficult. |
 |
| Tp get a good mirrored image I use the first cup to cut the second cup. |
 |
| Step 4 – Stitch the seam and make sure the point is rounded. This helps the curve too. |
 |
| Step 5 – Pin the lace over the cup, starting at the top edge. Depending on the amount of stretch it can be that the lace will be a bit longer than the cup. That is no problem. Make sure there are no wrinkles. |
 |
| Step 6 – Stitch the upper edge with a zigzag stitch and do that with the rest of the cup too. I did the top edge from the outside, the rest from the inside. I changed the position of the pins for that. |
 |
| Step 7 – finishing: here you can see the lace extends over the cup. It is cut off. |
 |
 |
| The result : both cups covered. The edges have 3.5 mm seam allowance (in this pattern), which is about the width of the zigzag that is used to stitch the lace to the cup. |
 |
This comment has been removed by a blog administrator.
ReplyDelete