I started this separate blog with a lot of good intentions, but in reality there is not enough time in a day to do all I'd like and keeping up with a separate blog on lingerie sewing is not working. I will close this blog and not add any new entries.
All my sewing adventures, including lingerie sewing and the occasional tutorial will be on my blog Sigrid Sewing projects.
Thank you for following this blog and hope to see you at my other blog.
Thursday, May 15, 2014
Tuesday, August 13, 2013
Interfacing bra cups
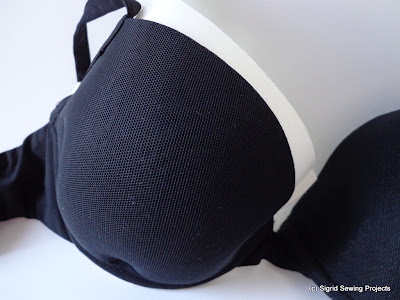
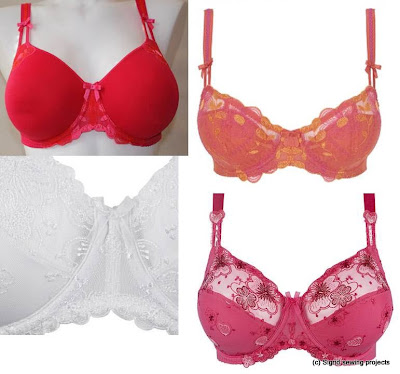
Most of the bra’s I make have interfacing. Below is my default bra that I have made in a lot of variations. These are my latest additions to the lingerie drawer.


Usually I use a non stretch interfacing for the under cup and the side cup, which gives me the support I need. For a neat way of finishing also on the inside I do the following:
Pin right side of lace to right side of the under cup. Pin the non stretch interfacing layer on top of the lace. The lace is now sandwiched between the under cup lycra and the interfacing.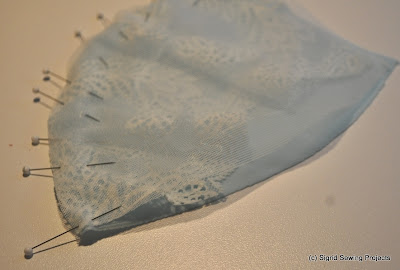
Sew the seam with a straight stitch.
Turn to the right side and edgestitch the under cup. I use the invisible hem foot for this with the needle position to the left. While doing this I make sure that the lycra and interfacing are folded down properly.
I do this by tugging it a bit with my fingers, I don’t use pins.

Trim the seam allowance.

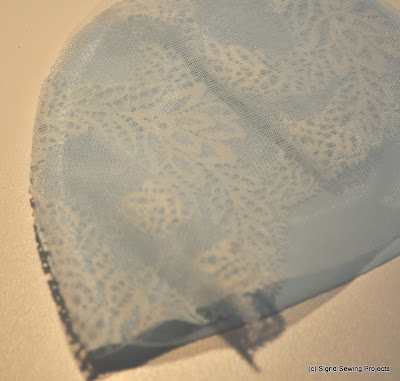
The result on the outside of the cup
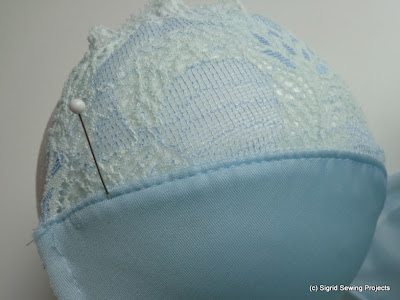
And on the inside.

For this bra on which I’m working now I then stretched the lcyra a bit over the interfacing as described in this post. The extra is still on the cup and has to be trimmed.
The side cup I sew in the same way.
Usually I use a non stretch interfacing for the under cup and the side cup, which gives me the support I need. For a neat way of finishing also on the inside I do the following:
Pin right side of lace to right side of the under cup. Pin the non stretch interfacing layer on top of the lace. The lace is now sandwiched between the under cup lycra and the interfacing.
Sew the seam with a straight stitch.
Turn to the right side and edgestitch the under cup. I use the invisible hem foot for this with the needle position to the left. While doing this I make sure that the lycra and interfacing are folded down properly.
I do this by tugging it a bit with my fingers, I don’t use pins.
Trim the seam allowance.
The result on the outside of the cup
And on the inside.
For this bra on which I’m working now I then stretched the lcyra a bit over the interfacing as described in this post. The extra is still on the cup and has to be trimmed.
The side cup I sew in the same way.
Friday, August 2, 2013
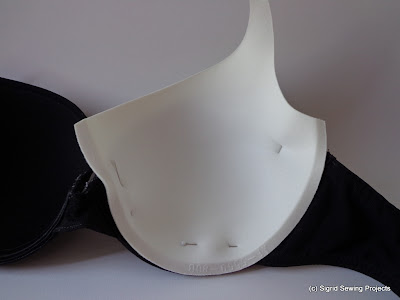
Shaping and covering preformed cups

Preformed cups are not always available in the right shape or color. The colors available (when you are lucky) are off-white, black or brown. When you want to use lace to cover, it might be necessary to cover the cups with lycra in a matching color first.
Below photos of how I shaped a pair of preformed cup to match a rtw bra of my daughter and how I covered it with lycra. The cups are once from Kantje Boord.
I pinned the cup int the rtw bra and traced the line of the cups
For future reference I noted the cup size on the part I will take off and keep. If this bra is ok I can use the top part as pattern to mark the next pair of cups.

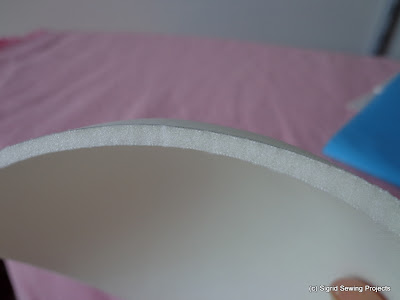
After cutting the cup at the traced line the top was a bit thick. The cups are pressed very flat at the edges, but that part is now removed.
My solution: use a narrow zigzag stitch to thin it. Below you see the difference on one of the top pieces (only for the photo, no need to do this on the part you cut off of course)
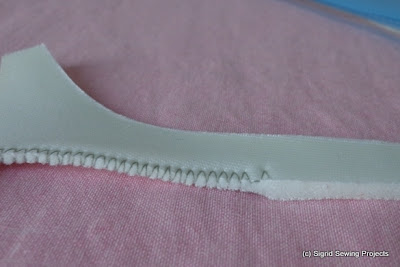
The result on the cup.

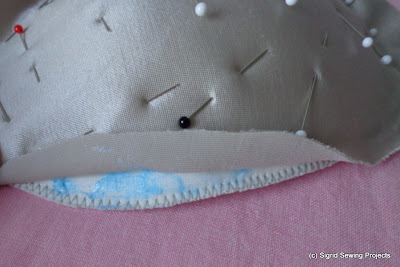
A piece of lycra a bit bigger than the cup is used to cover it. Pin from the center and pull the fabric a little. Not too much, the shape of the cup should remain. Use a lot of pins where necessary. I found this easier to do on the smaller cup for my daughter than on my own larger cups. Less round makes a difference ;)

A little trick at the edge. I used a glue stick I found recently at a notions store. It’s my gadget find of the year, I have used it often already. It will wash out.
I glued the edges and pulled the lycra over it and pressed firmly with my fingers. If you don’t have a glue for this you can use pins, but this makes this step so easy.

The next step is to cut off the fabric at the edge and cover with fold over elastic.
I pin just the first part with one or two pins and then stitch and pull it over the edge with a zigzag stitch. The trick is sew a little bit, pull the elastic a bit and place it around the edge, sew a few centimeters…. Apart from the first pin(s) no pins are used any more. Slow and sewing short distances at a time are what is important here.

Whether you cut off the lycra from the other seams depends on the style of bra you’re making. I trimmed all lycra to the shape of the cup apart from the armhole. I’m not sure yet what I will do with the band and cutting off can always be done.

Artificial light makes the color champagne instead of grey all of a sudden.
Monday, July 29, 2013
Follow my blog with Bloglovin

A post to be able to claim this blog with Bloglovin (which I don't understand, but that's just the way it is).
A post to be able to claim this blog with Bloglovin (which I don't understand, but that's just the way it is).
Thursday, July 4, 2013
Bra in a swimsuit
This is not a tutorial by me, but a link to a post where this is described in detail: http://threedresses.org/2013/06/12/adding-support-to-your-swimsuit/
I've owned a bra with a build-in bra a long time ago and worn it till it almost fell apart. I haven't owned or found a well fitting swimsuit since (at least not in a price range I'm willing to pay). As I'm not much of a sunbather or swimmer, not too much of a problem, but I would like to try this sometime.

I've owned a bra with a build-in bra a long time ago and worn it till it almost fell apart. I haven't owned or found a well fitting swimsuit since (at least not in a price range I'm willing to pay). As I'm not much of a sunbather or swimmer, not too much of a problem, but I would like to try this sometime.
Thursday, June 27, 2013
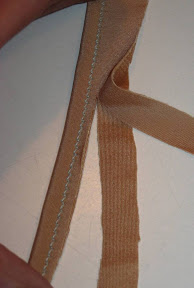
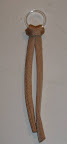
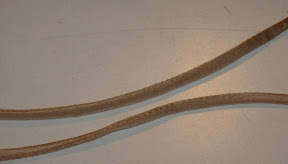
Narrow straps
This is a way to make narrow straps from lycra that some designers use often in their lingerie. This technique can be used for other fabrics as well.


Monday, June 24, 2013
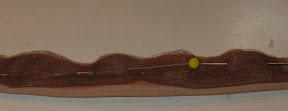
Bridge from lace
This tutorial was published on my regular blog some years ago. It's not about constructing the complete bra, but only describes the construction of the center front/bridge when you want to make it with lace as in the photo below and the inspiration from rtw above.

- There is a seam at center front, add a seam allowance to the pattern piece if necessary!
- Cut the centerfront with the bottom edge on the scallop (deepest point of it). Don't use seam allowances there.
- Sew the center front as you do normally (with non stretch interfacing) and attach it to the side/back panel.


- Cut the elastic in the length you need and mark center front and the points to match the seam under the cup (in this way of working you have to measure your elastic, for me that is lengt of band minus 20%).
I've marked with disappearing ink, you can also use pins.

- Stitch the elastic with a small zigzag stitch to the bottom of the band, do NOT stitch the center front.
- Trim the seam allowances if necessary
- Fold the elastic to the inside and topstitch with a triple zigzag.
In this way the center front of the elastic is held in place.

http://lh6.ggpht.com/_qwCJkXRo8Es/R-5vQ5s4QDI/AAAAAAAACG4/794IpYHJ_BI/s400/2%20Overview%20of%201st%20step.jpg
Subscribe to:
Posts (Atom)