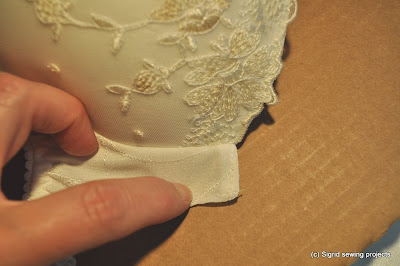
| The next step in constructing the bra is inserting the cups. Pin the cups into the band. In my pattern the cups have a seam allowance of 3.5 mm, the band 6 mm. That’s why I have the band extending the cup a bit. Easy to see when pinning, but of course you could work with the same seam allowances. Stitch the cup with a straight stitch just beside the zigzag stitch that holds the lace to the cup. |
 |
| Important is matching the center front point at both sides and at the side seam. |
 |
 |
| The cups are inserted. |
 |
 |
| Stitch the wire chanelling with a straight stitch to the cups. Match the wire channelling with the stitching of the cup. On this preformed cup I found it easy to without pinning first. |
 |
| On the outside the wire channelling is topstitched. This can be done once on the outer edge of the channelling only, or twice. Then an extra row is stitched very close to the cup. I always do it twice and have the feeling that it makes this area more flat after you’ve put the wire in. In this style it might not make that much of a difference Topstitch the outside line of the wire channelling for the boning too. |
 Next: part 4 - finishing |
Saturday, June 22, 2013
Balconet bra - part 3: inserting the cups
Subscribe to:
Post Comments (Atom)
Beautiful. You make it look so easy. I'll be using your blog for my bra making endeavours soon. Thanks for all this info.
ReplyDelete